Part 1. Use Standard Mode to Fix iOS System Issues without Data Loss
First, launch iOS System Repair and select the “System Repair” option
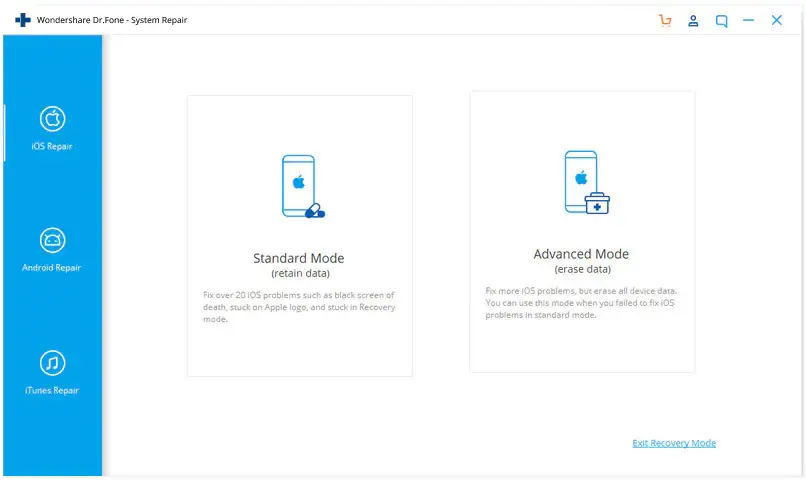
After that, connect your iPhone, iPad, iPod Touch to PC using a USB cable. Once the tool detects your iDevice, you will get two options: Standard Mode and Advanced Mode.
Note– Using Standard mode fixes several iOS issues by retaining data from the device. Advanced mode also fixes several iOS system issues but deletes data from the device. Therefore, it is suggested to use advanced mode only when standard mode fails.
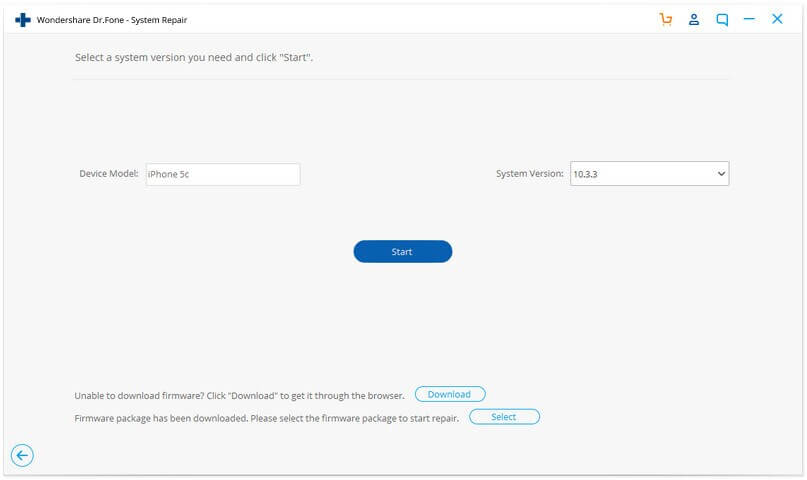
Here, the software identifies the model of the phone automatically and displays the iOS versions. You have to choose a version and tap on the “Start” option.

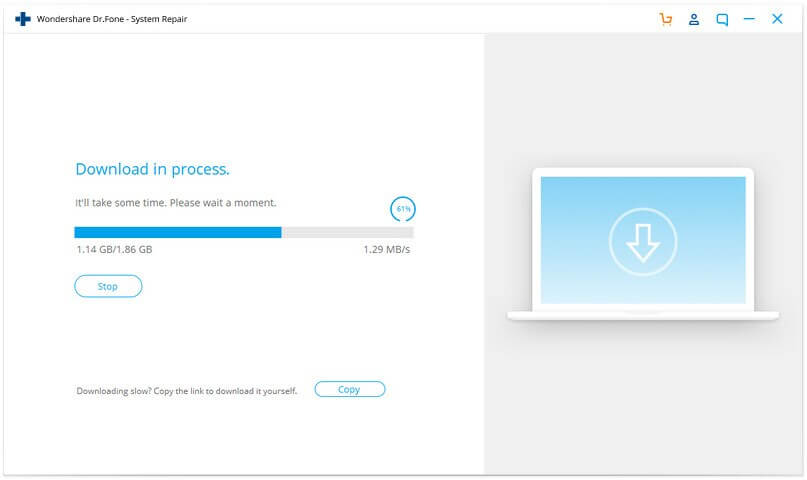
Now, iOS firmware will get downloaded but as the firmware is large, so it will take some time to complete it. Ensure your data connection is stable during the process. If by chance the firmware is not downloaded then you have the option to download it by tapping on the “Download” option from the browser and then choose “Select” to restore.
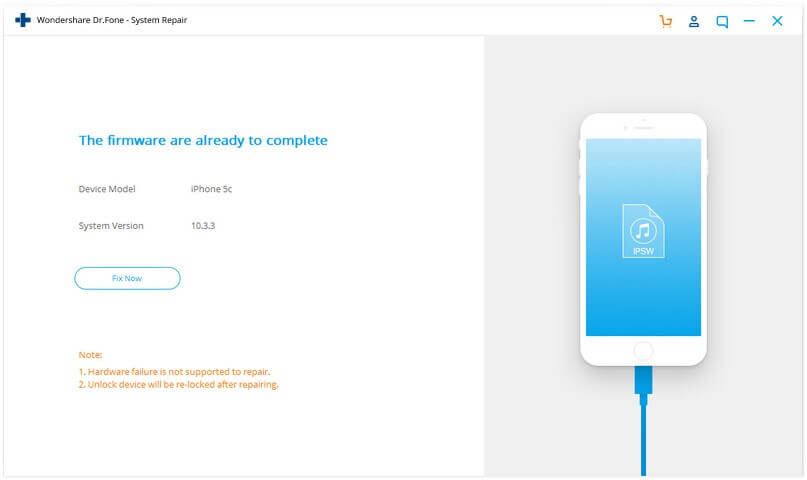
Once the firmware is downloaded, the software will verify the firmware.

The below screen will appear when iOS firmware is verified. Now, tap on “Fix Now” to begin repairing the iOS device and make it back to normal.
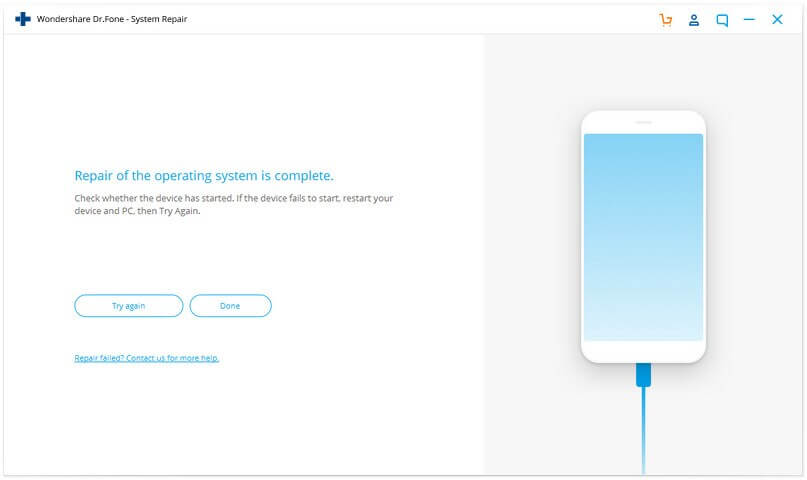
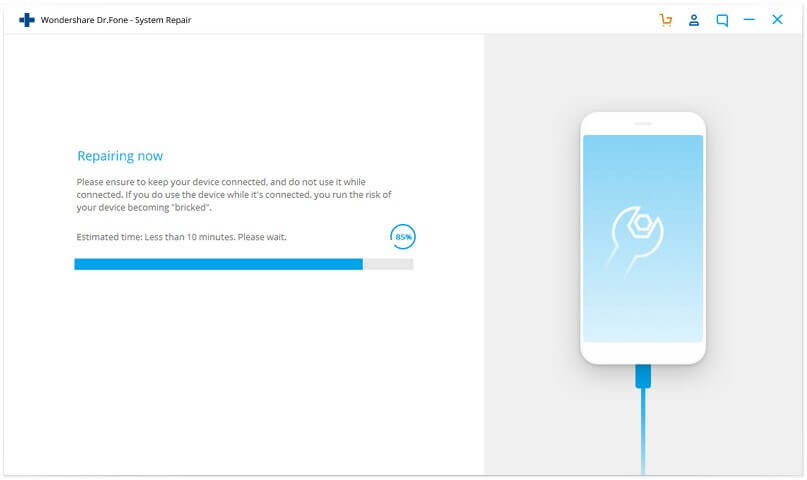
Next, your iOS device will be successfully repaired within minutes. Now, wait for your device to start and all errors will now have fixed.
Part 2: Use Advanced Mode to Fix iOS System Issues
When Standard Mode does not fix the iOS issue then try Advanced Mode. But this mode will delete the device to completely fix the issues, so kindly backup all stuff previously.
Tap right on the second option “Advanced Mode” and make sure your device is connected to a stable internet connection.
Here, your device model is detected similar to standard mode. Now, choose iOS firmware and tap on “Start” to download. Even you can tap on “Download” to download it with ease and tap on “Select” after it is downloaded on PC.
When the firmware is verified, click on “Fix Now” to repair iDevice in advanced mode.
The advanced mode will run to fix all issues on iPhone/iPad/iPod Touch in depth.
After the fixing is finished, you will see that all your iDevices will work properly.
Part 3: Fix iOS System Issues When iDevices Cannot Be Recognized
When your iPhone, iPad, iPod Touch devices do not work properly and can’t be identified by PC then you have to click on “Device is connected but not recognized” when the iOS Repair tool shows on the screen. Simply tap on it and the tool will suggest you boot your device in Recovery Mode or DFU mode. You can follow the below instructions to boots iDevices easily:
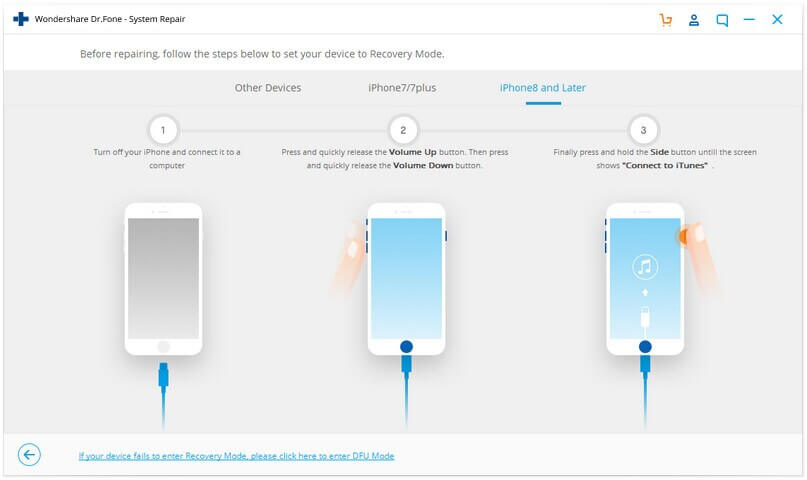
Follow the steps to boot iPhone 8 or later in Recovery Mode:
- First, switch off your iPhone 8 and connect it to PC
- Now press and release Volume Up button and after that, press and leave the Volume Down button.
- At last, tap and hold the Side button unless the screen shows Connect to iTunes screen.
Follow the steps to boot iPhone 8 or later in DFU mode
- First, connect your device to the PC via a USB cable. Then press Volume Up button and leave the Volume Down button immediately
- Now, long-press the Side button unless the screen turns black. After that, without leaving the Side button, long press Volume Down together for 5 seconds
- After that, leave the Side button but continue to hold the Volume Down button. The screen will turn black when DFU mode is activated successfully.

Now, when your iOS device enters Recovery or DFU mode, select Standard or Advanced mode to move further.
Part 4: Easy Way To Get Off Recovery Mode
When your iDevice gets stuck on recovery mode then following the below steps will help you to get out of it.
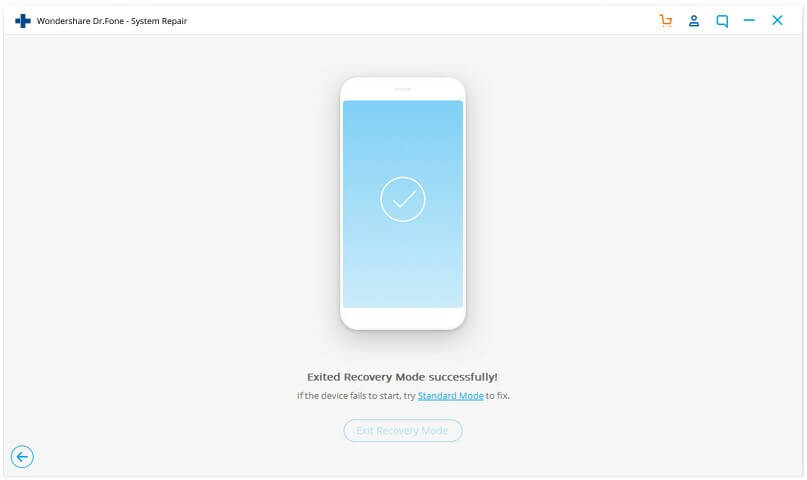
First, launch iOS System Repair and choose the “Repair” option. When you connect your device to PC, choose “iOS Repair” and then tap on “Exit Recovery Mode” in the lower part.
Here, you will see a graph that shows iPhone stuck in recovery mode. There, tap on the “Exit Recovery Mode” option.
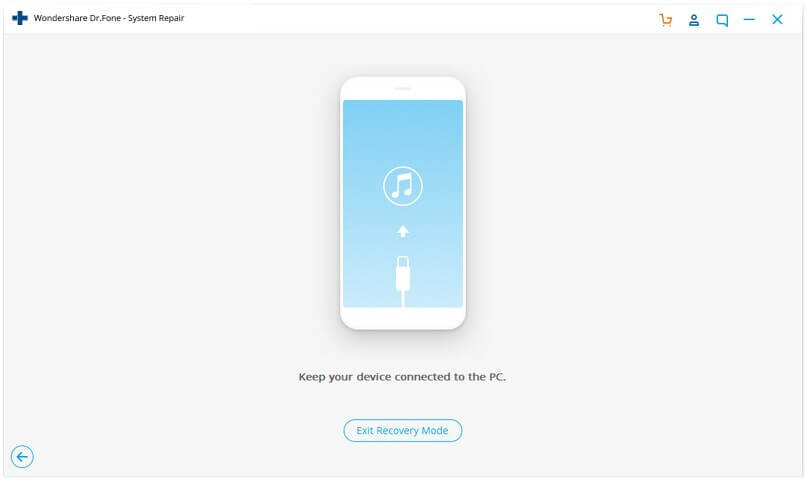
Now, your iPhone, iPad, iPod Touch will get out of Recovery Mode. But if your iDevice fails to get out of Recovery mode or when it is stuck in DFU mode then you should use iOS System Repair.