Part 1: Recover Data from iOS Device
Part 2: Recover Data from iCloud Backup
Part 3: Recover Data from iTunes Backup
Part 1: Recover Data from iOS Device Directly
Step 1: Connect Your iOS Device To Computer
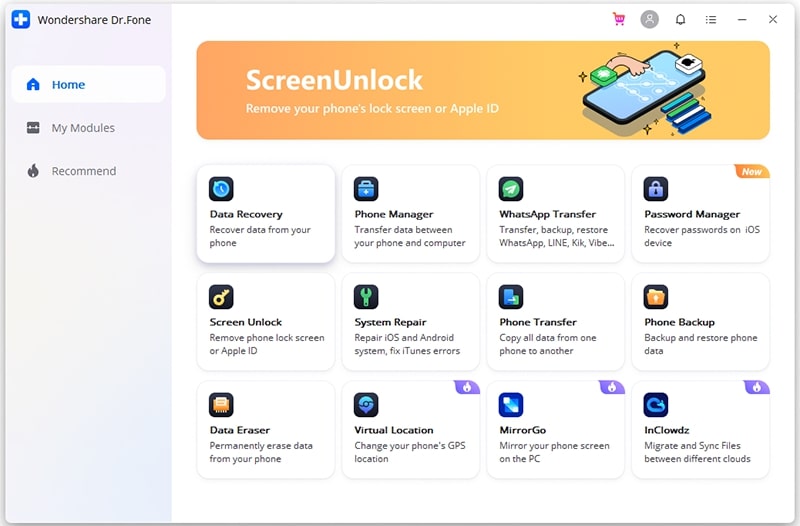
First, connect your iPhone, iPad, iPod Touch to PC via USB cable. After that, launch iOS Data Recovery software and select the “Data Recovery” option
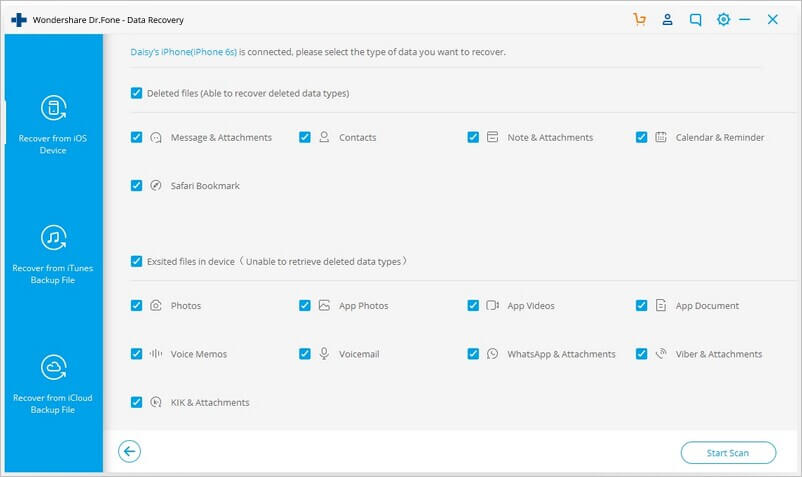
After the program identifies your device, it will show you the below window.
Note- Before you proceed using this software, download the latest version of iTunes. Turn off automatic sync in iTunes. Simply go to iTunes > Preferences > Devices, check “Prevent iPods, iPhones, and iPads from syncing automatically.
Step 2: Scan the device for lost data
Now, tap on “Start Scan” to scan the device for deleted data from it. This entire process may take some time that depends on the amount of data. While scanning, if you get the data you want to restore then you have the option “Pause” to stop the process.

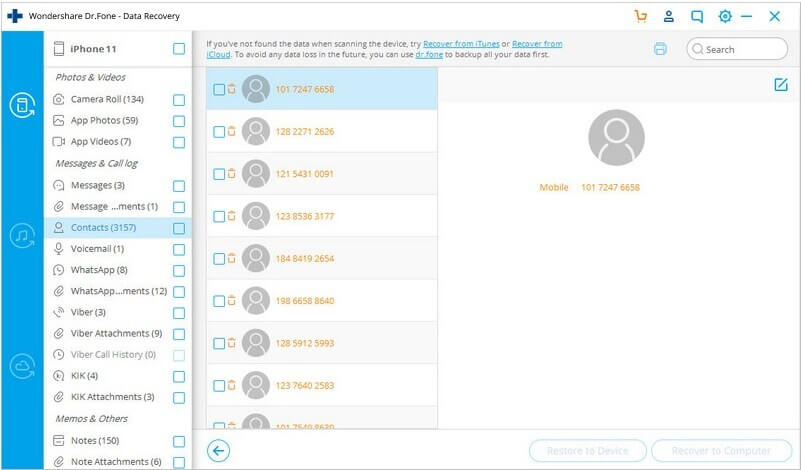
Step 3: Preview and recover scanned data
After the scanning is finished, the generated data will be seen. Category wise all the lost and existing data will be listed. To filter the data, you can click on the option “Only display the deleted items” to ON. Now clicking on file type, you can preview the found data. Even you can search for the specific data by typing keywords in the search box. After that, save the data to a computer or device by tapping the recovery button.
Tips about data recovery:
After you find the required data, simply put a checkmark to select them. Next, tap on the “Recover” button at the bottom right. By default, all recovered data will be saved on a computer. For text messages, iMessages, notes, or contacts, after you click on “Recover”, you will get a popup asking “Recover to computer” or “Recover to iDevice“. When you want to put those messages back to the iOS device, tap on “Recover to iDevice”.
Part 2: Recover Data from iCloud Backup
Step 1: Select Recovery Mode
Once you run iOS Data Recovery, select “Data Recovery” and tap on it
Next, select “Recover iOS Data“

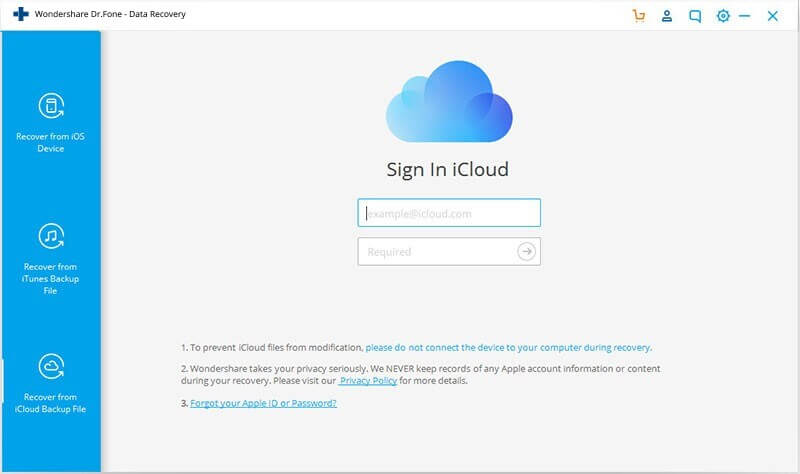
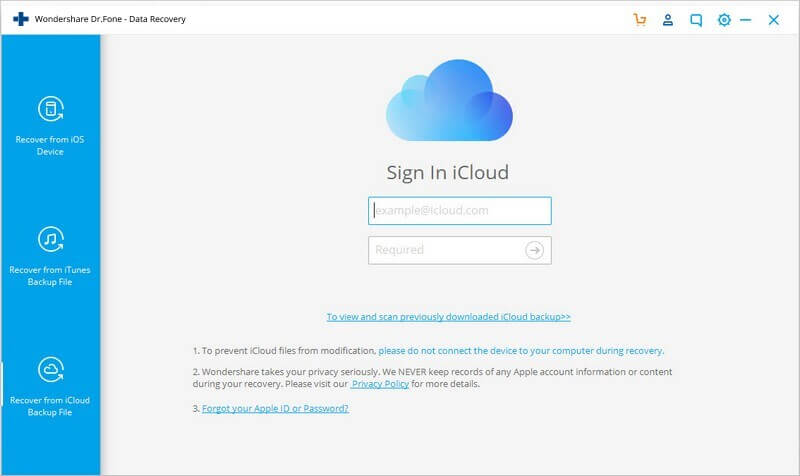
Now, you will see three options: You have to select “Recover from iCloud Backup Files“. After that, a window will appear as mentioned below. Enter iCloud ID and password when asked.
Step 2: Download iCloud backup file
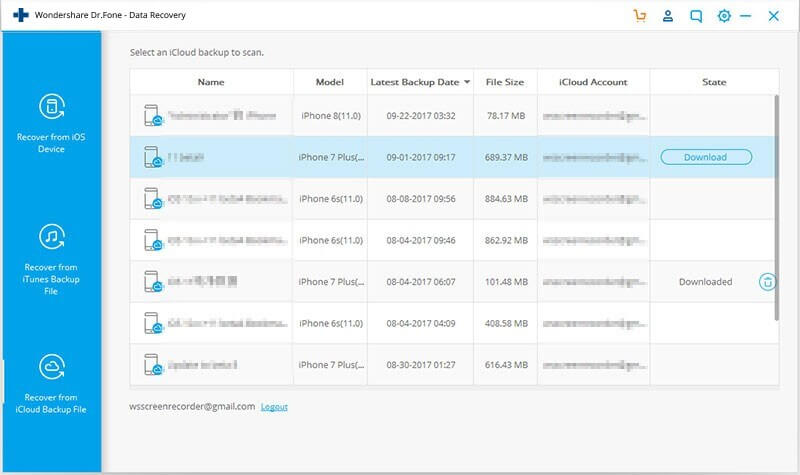
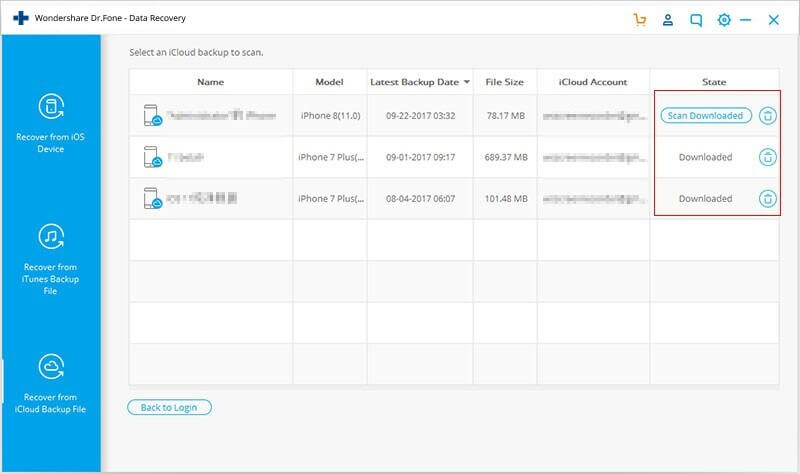
After you log in to your iCloud account, it will find all iCloud backup files. Select from where you will recover data and tap on the “Download” option.
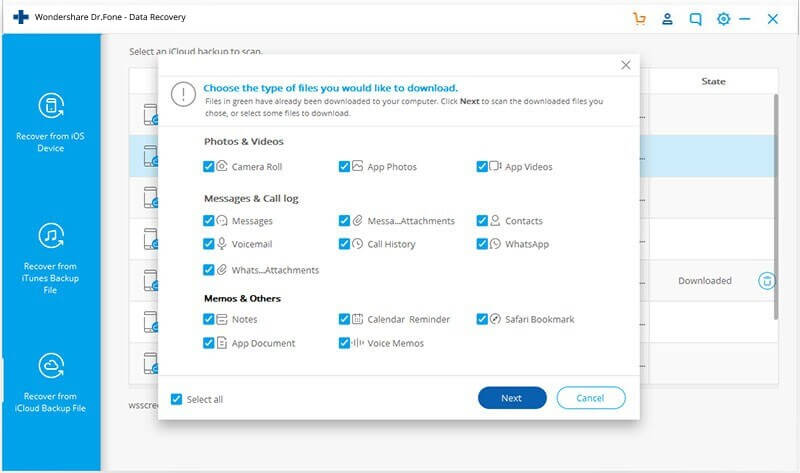
Now, in the popup, you have the option to select file types that you want to download. Doing this will lower the time of downloading. Next, simply scan the iCloud content and tap on “Next” to begin downloading.
Step 3: Preview and recover data from iCloud backup
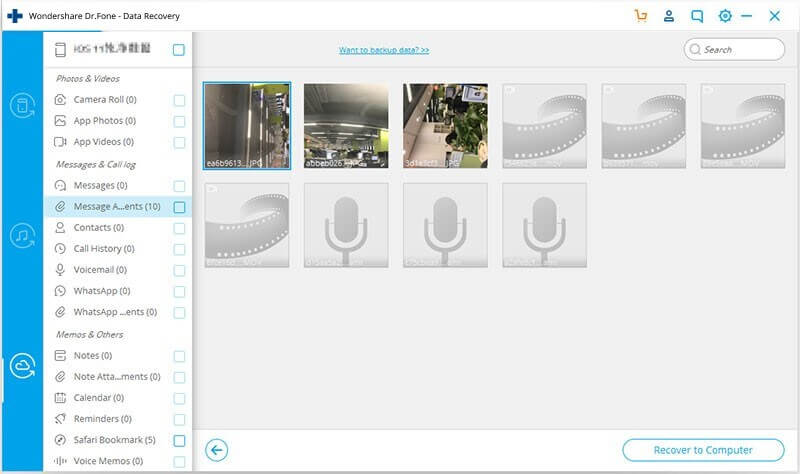
After the scanning is finished, you can see all the list of data from the iCloud backup such as contacts, photos, messages, etc. You have to check them manually and tick the item. After that, tap on “Recover to Computer” or “Recover to your device” to save them.
Remember that new messages, contacts, and notes are directly recovered to your iPhone, iPad, iPod Touch when connecting via USB cable.
Tips: Preview all data directly and recover from downloaded iCloud backup files
If iCloud backup files are downloaded previously then there is no need to sign in and get the backup file again from iCloud. You have to tap on “To preview and scan previously downloaded iCloud backup file” under account sign-in information.
After this, all the list of downloaded iCloud backup files will be listed. To extract the files, you can select any one of them. These backup files are stored on a computer and if you don’t need them then simply tap on the Trash icon to remove them completely.
Part 3: Recover Data from iTunes Backup
Step 1: Choose Recovery Mode
First, launch iOS Data Recovery and tap on the “Data Recovery” option
After that, select “Recover iOS Data“
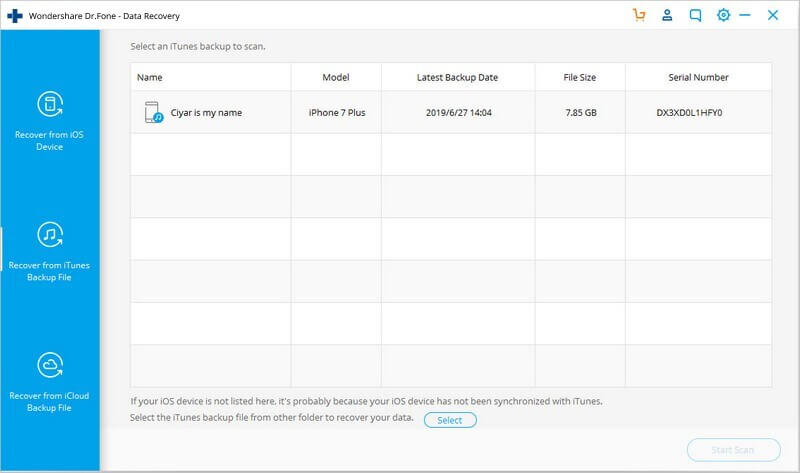
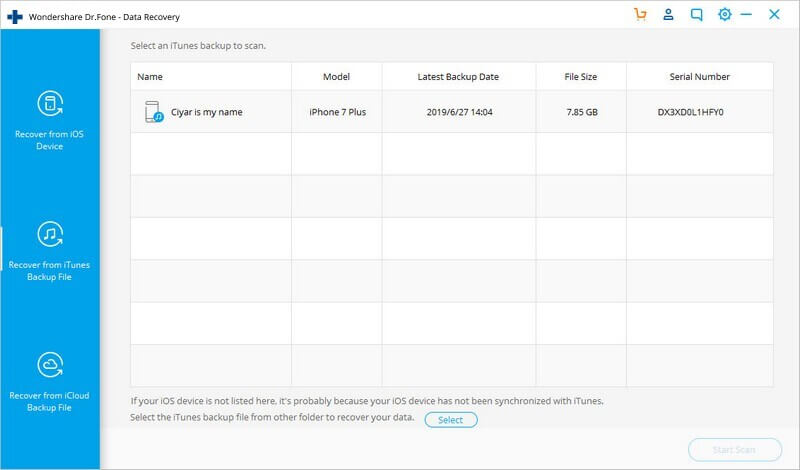
Here, you can see three options: Select “Recover from iTunes backup file“. After that, the iTunes recovery backup tool will identify all iTunes backup files on the computer and then display them on the window. From here, you can select the data according to the data required.
Step 2: Scan data from iTunes backup
Now, select the iTunes backup file that consists of the data you wish to recover and tap on “Start Scan“. The data will be extracted within few minutes from iTunes backup.
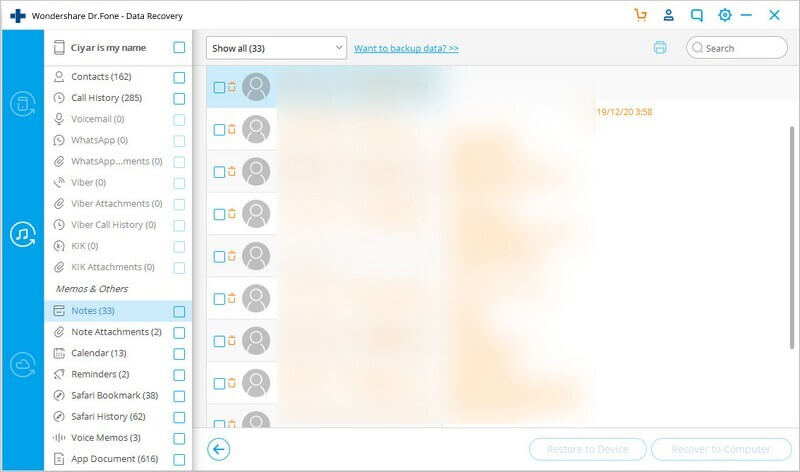
Step 3: Preview and recover data from iTunes backup
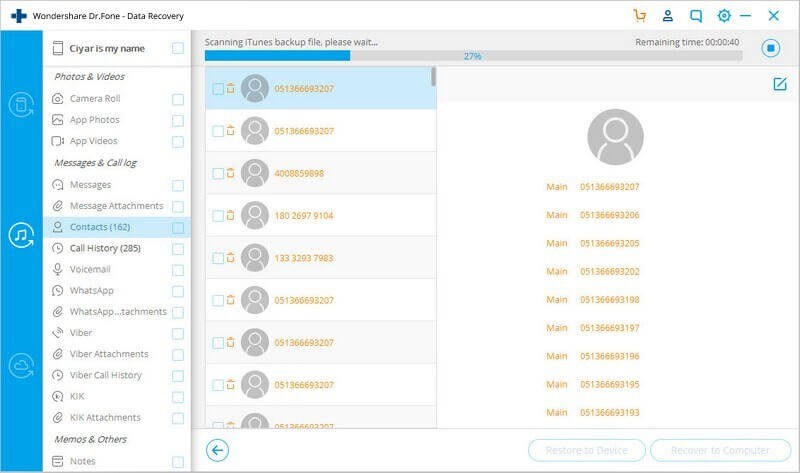
Here all the files extracted will be listed category-wise. You can preview all of them one by one and then mark and restore them by click on the “Recover” button. All notes, contacts, messages will be recovered to your device directly only when your device is connected to the computer through a USB cable during the process.
Tips: You have the search box option from where you can type the file name to search it.
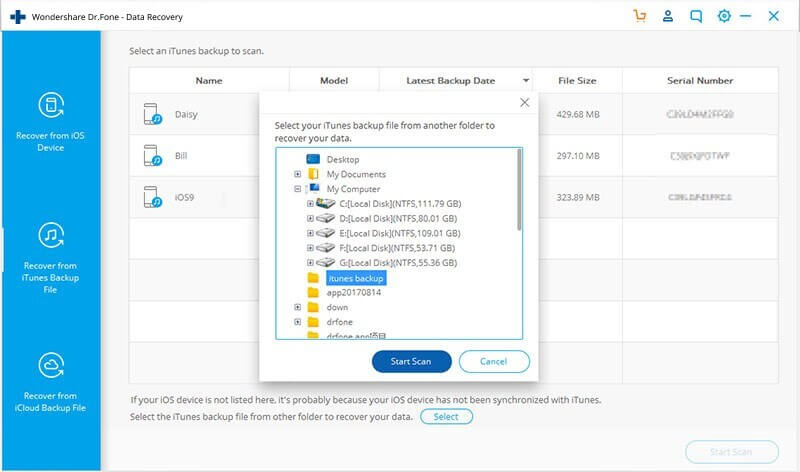
Important: What to do if your iTunes backup is stored somewhere else?
It may happen that your iTunes backup file is located somewhere else, in that case how to preview and restore content is hectic. In this situation, you have to tap on “Select” when you are in the first step under the iTunes backup file list and easily select the iTunes backup file from anywhere.
After that, when you get a popup window, preview and select the iTunes backup file. Now, tap on “Start Scan” and you can go with step 2 above.