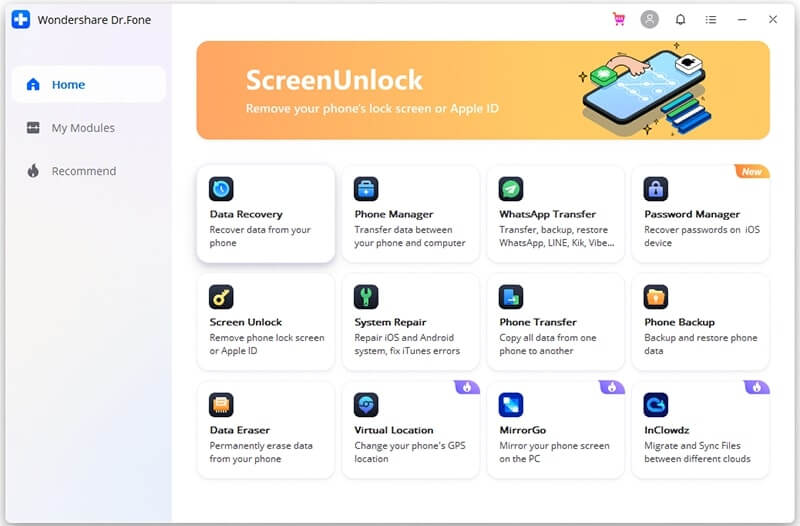
Backup & Restore iOS Devices
Part 1: Back Up iPhone/iPad/iPod touch
Step 1: Connect your iOS devices to a computer
After you launch iOS Backup & Restore software, select the Phone Backup option. After that connect your device to the computer using a USB cable. Your devices are automatically detected by the software by default.
For iOS devices, the software supports to backup many data types along with social app data like WhatsApp, Viber, LINE, Kik, etc., privacy data, and others. Here, we will select Device Data Backup & Restore.
Step 2: Choose file types to backup
Once you choose Device Data Backup & Restore, the software will identify the types of data automatically and from there, you can choose the file types to backup. And then tap on “Backup”.

Even you can tap on the folder icon below file types to customize backup file saving.
The entire backup process will take some time that totally depends on the storage. After that, the software will display all supported data like messages, call logs, photos, videos, memos, contacts, and others.
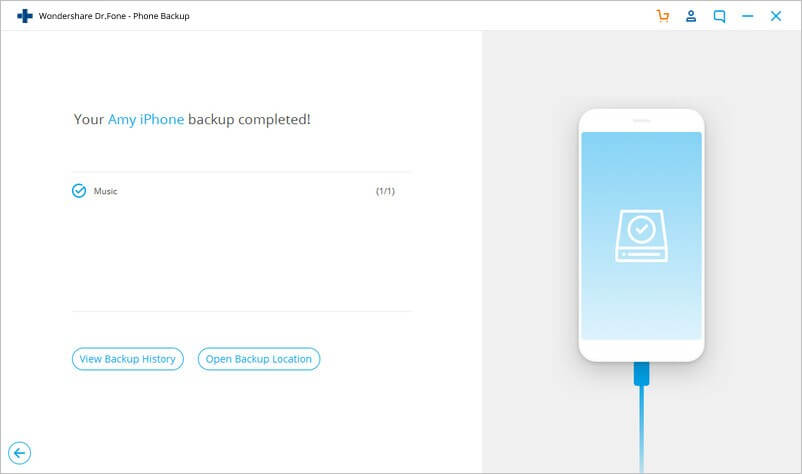
Step 3: Check what is backed up
After the backup is finished, you can tap on View Backup History to view all iOS device history. Just tap on View that is next to it in order to check the contents of the backup file in categories. Here, you can select one single file or more than one to print or export to a computer.

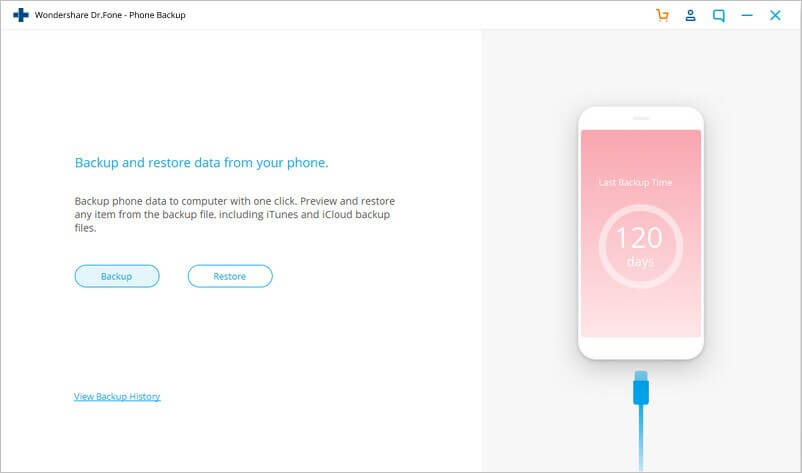
Part 2: Restore Backup To Your Computer
Step 1: Select the backup files
First, launch iOS Backup & Restore and choose Phone Backup. Now, connect your iPhone,iPad, iPod Touch to PC and tap on Restore.
If this option is used before then you will get an option “View backup history“. Here you have to tap on this option to view the backup list.
Now, the software will display backup history. You only need to choose the backup file and tap on the View button next to the backup file.
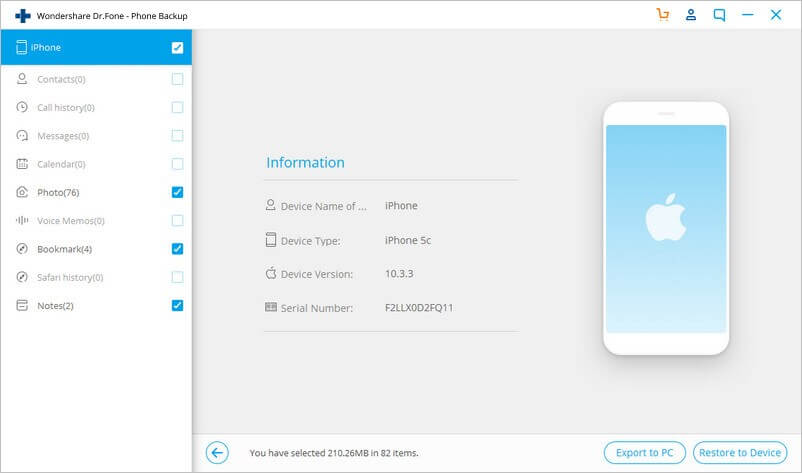
Step 2: View and Restore the backup file
Once you tap on View, the program will take some seconds to analyze the backup file and display all data in categories.
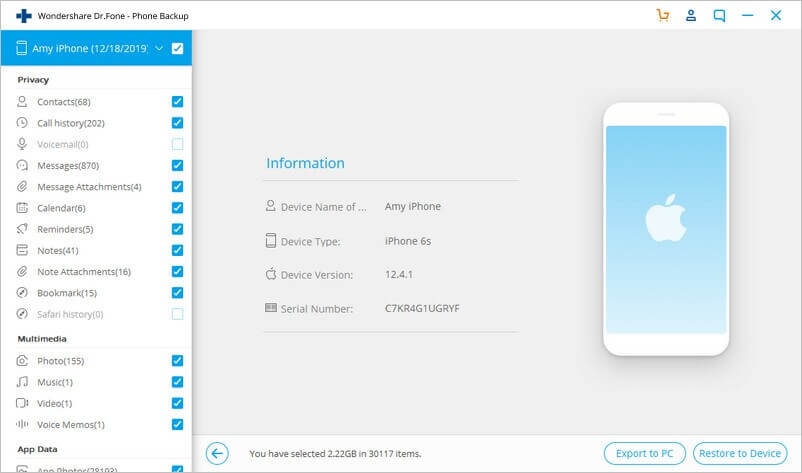
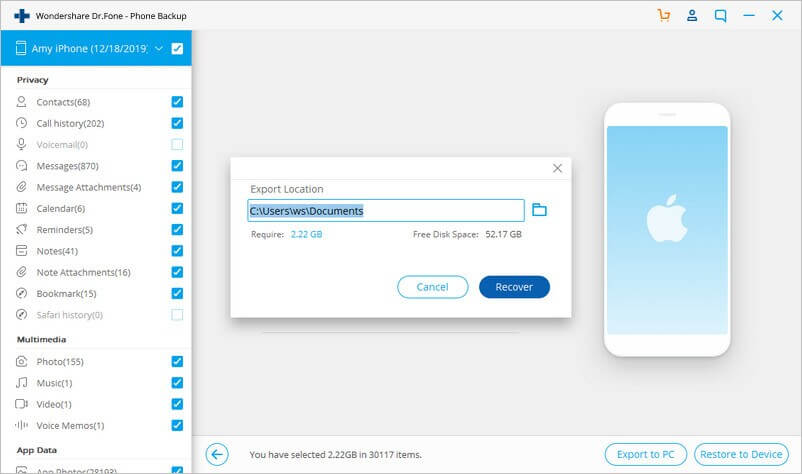
When you find all those files that you require, either select a few or select all of them to proceed further. Currently, the software supports Notes, Contacts, Messages, Photos, videos, music, Safari bookmarks, Call History, Calendar, Voice memos to restore to the device. Therefore, you can restore or export them to your computer.
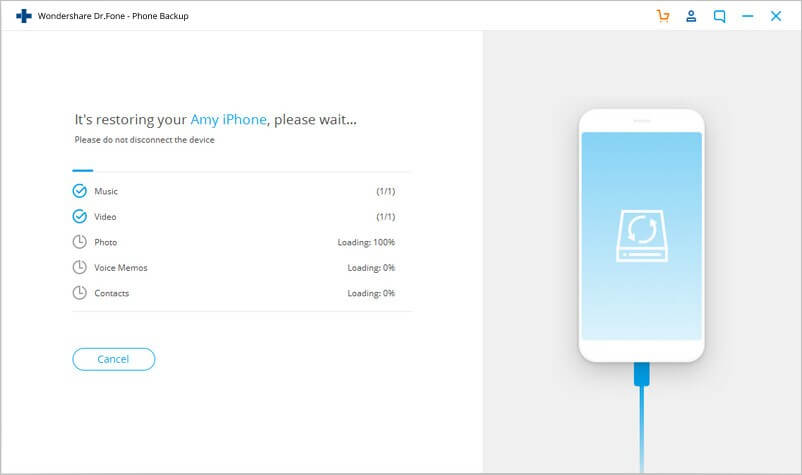
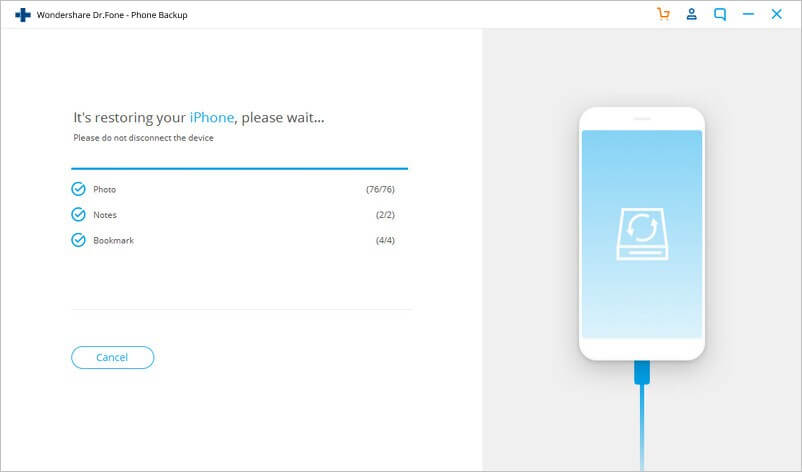
If you want to restore files to the device, choose them and click on Restore to Device. After few seconds, all the files will be on your iOS device.
Here, if you wish to export the chosen files to a computer then tap on Export to PC. After that, select the save path to export your files.
Restore iCloud Backup to Your iOS Device
Step 1: Connect your iPhone/iPad to computer
First, download and install iOS Backup & Restore on the computer and choose “Phone Backup“.
Now, connect your iPhone/iPad to the computer via USB cable and tap on the Restore option
Step 2: Sign in to iCloud credentials
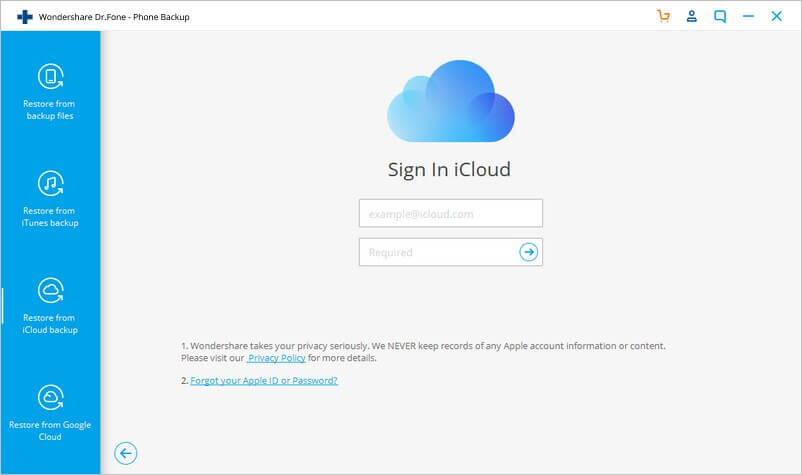
From the left column, choose Restore from iCloud Backup option and sign in to the iCloud account
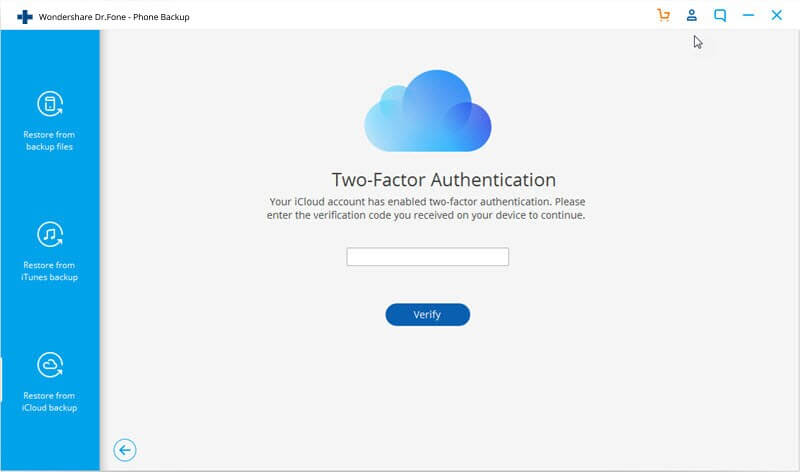
If you have enabled two-factor authentication for the iCloud account then you will receive a verification code. Enter verification code and tap on verify.
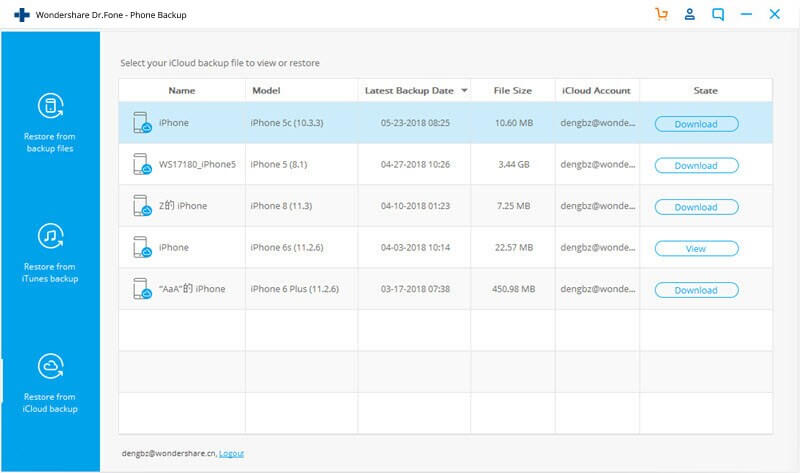
Step 3: Download iCloud backup content
After you successfully sign in to your iCloud account, the software will display all backup files on your iCloud account. Now tap on the Download button to download the backup file.
Step 4: Preview and restore iCloud backup to iPhone/iPad
Once your backup file is downloaded, the software will display all iCloud backup data in various categories. You can easily preview iCloud backup data and choose those ones that you want to restore.
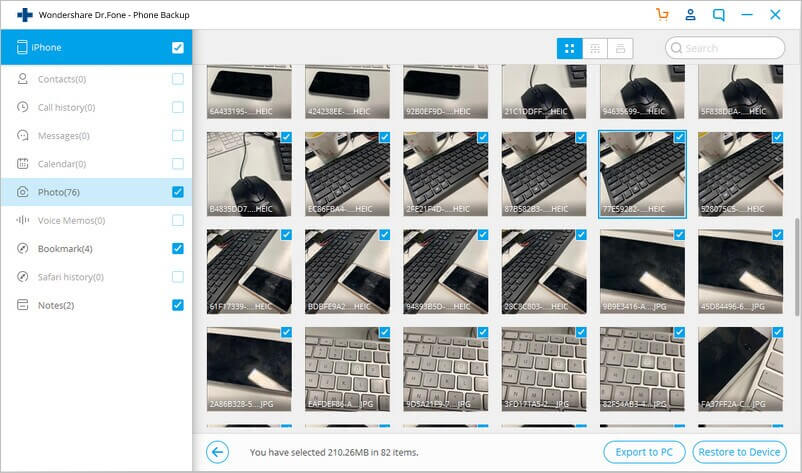
After that, tap on Restore to Device to restore the iCloud backup to iPhone/iPad. Currently, the software supports contacts, messages, calendar, call history, notes, voice memos, Safari history, photos, bookmarks, etc from iCloud backup to iPhone/iPad.
Restore iTunes Backup to Your iOS Device
Step 1: Connect your iPhone/iPad to computer
First, download and install iOS Backup & Restore software and launch and then choose “Phone backup”.
Now, connect your iPhone/iPad to the computer via USB cable and tap on the “restore” option.
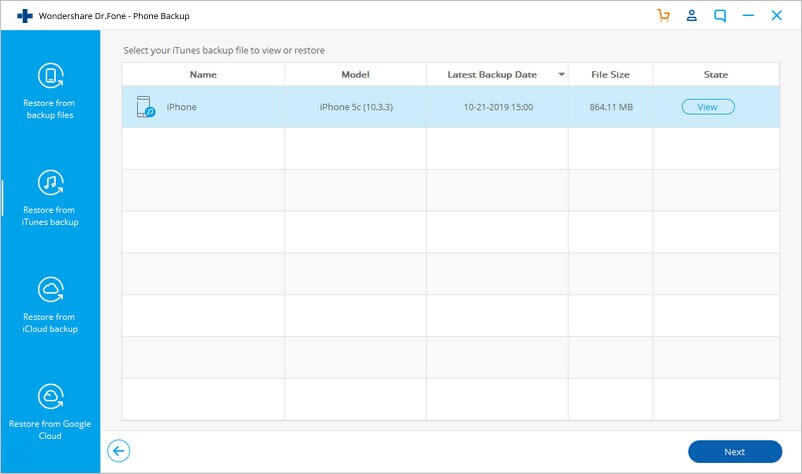
Step 2: Analysis iTunes backup file
From the left side, choose Restore from iTunes backup. You will get the complete list of iTunes backup files from the iTunes backup location. Choose iTunes backup file and tap on View or Next option
Step 3: Preview and restore iTunes backup to iPhone/iPad
The software will extract all data from iTunes backup file and display it in various data types
Now, you can go through all types of data and choose the one you want. After that, tap on Restore to Device to recover the files to iPhone/iPad.